
Grade Level: 3
Content area: History-Social Science
Standard identifiers: HSS-3.2.2
Objectives: Students will:
- Understand how the local natural resources were and are used by Chumash people to make baskets
- Weave their own baskets
Materials and Resources:
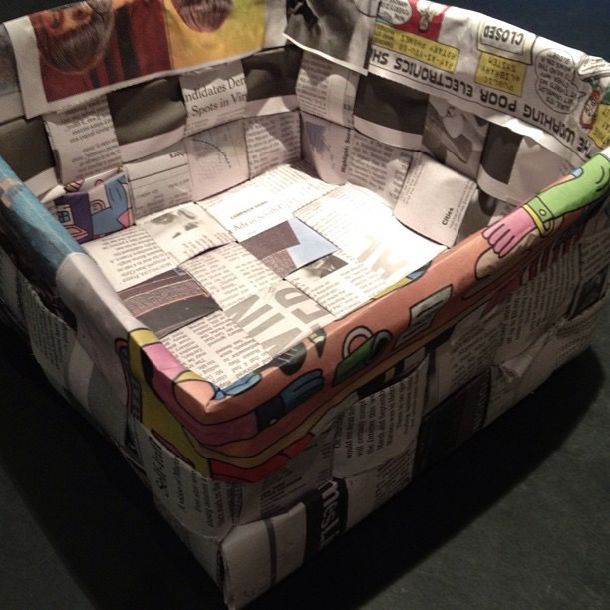
- Newspaper
- Wooden Skewer
- Craft Glue
- Elmer’s Glue
- Bowl
- Chumash Baskets: Shows the traditional plants used in basket weaving. Created for young audiences.
- Weaving Past With Present: This video is a little more advanced. It talks about the significance of modern day basket weaving.
- Wheaton Arts: Newspaper Basket: Instructional video and written instructions
- Instructional video on how to make a newspaper basket: An instructional video to show students; the way the paper is colored makes following a little clearer than Wheaton Arts
- Autry Museum Basket Making Lesson Plan: Another lesson plan on making baskets out of reeds. Includes a worksheet about basket uses. Created for 4th graders but can be adapted.
Assessment (informal):
Strategies for English Language Learners and Learners with Special Needs:
- Prepare the materials ahead of time, such as cutting the paper strips and creating the tubes around the wooden skewers.
- Pause the video to give students time to create as they watch.
- Consider starting the baskets for them. The base may be tricky.
- Use a simpler weaving pattern, such as this one. (This uses different materials than listed below.)
Instructional Sequence:
Introduction and explanation to students about the purpose of the lesson (10-15 minutes)
- Start with some discussion questions:
- Do you use baskets or anything similar to a basket (backpacks)? What do you use it for? What is it made of?
- What if you couldn’t go to a store and buy a basket, bowl, or backpack? What would you use to make something to help you carry things?
- Have you ever braided hair or had someone braid your hair? Braiding uses a weaving pattern. Weaving is a pattern created by taking one string over and under another.
- Tell the students that the Chumash use natural resources to make baskets. They used them to carry and things like food, shells, and even water.
- Show one or two of the videos for students to see the types of plants used and the intricate designs of the Chumash baskets.
- Some special features of Chumash baskets are:
- Baskets are created using a “coil” technique, with the bottom of the basket starting with a coiled spiral
- There are often notch marks, or “ticks” along the rim of the basket
- There is usually a band around the inner edge, with extra “filler” designs above and/or below the band
- Images or pictures are often symmetrical and repetitive
Teacher modeling (5 minutes)
- Show part of the demonstration video (either Wheaton Arts: Newspaper Basket or Instructional video on how to make a newspaper basket) to give students an idea of what they will be doing.
Guided practice (10 minutes)
- Have students create their baskets as they watch the video or teacher demonstration.
Practice (independent, partner, group) (10 minutes)
- After a while, students will pick up on the pattern of the basket making process.
Closure (5 minutes)
- Discussion questions:
- How are the baskets we made in class similar to the baskets we saw in the video? How are they different?
- Do you think it would be easier or harder to use natural resources?
- What will you use your basket for?
Monitoring for student learning/understanding:
- As the instructional video is playing, walk around and make sure students are following.
Reflection after the lesson:
Take reflection notes on how the lesson went for your future reference.
